Updated: April 24, 2010
I am a great fan of virtualization products, VMware in particular. Player, Server, ESXi, they all offer a range of creative, useful solutions to the computer user when it comes to running multiple instances of various operating systems, all at once.
VMware products stand out as the leader of the virtualization pack. Some of its products are free for personal use, like the Player and Server, intended to entice you into buying the fully featured, next-level software, like ESX or Workstation. While ESX is definitely an overkill for home use, Workstation sounds like a great idea.

Introduction
Why would you spend almost 200 dollars on a product well complemented by free features already available in the Player and Server, you may ask. Well, VMware Player is a great tool to get started with virtualization. It's also mainly useful for people who need to run another operating system occasionally, without any fancy extras. The Server offers more, with a powerful network stack, remote console, multiple CPUs, 64-bit support, powerful command line and scripting, and more. Then, you also have with a single snapshot for virtual machines and limited 3D support.
VMware Workstation ups the ante with a very decent 3D support, the ability to record movies, unlimited snapshots and snapshot replay, Shared folders, the Unity mode, full USB 2.0 support, and several other features. Worth the investment? Definitely.
Today, I will show you how to install VMware Workstation in Linux and begin a 30-day evaluation of this excellent product, upon which you will be sorely tempted not to buy this phenomenal product. The reason I chose to demonstrate on Linux rather than Windows is to show you: a) how simple it is b) that Linux offers the same level of comfort, fun and computing power like Windows. As virtualization fans, this is a great opportunity for a little exploration adventure. So let's begin.
Demonstrated on 64-bit openSUSE 11.2 Gnome on my LG RD510 laptop, with the latest and greatest Workstation 7 freshly baked in the VMware ovens.
Install VMware Workstation
Your first step is to register at vmware.com. After completing the registration step, you will receive an email with an evaluation key and a link to download the product. You need either the 32-bit or 64-bit VMware Workstation bundle. You can identify the download by the .bundle suffix. Download the one matching your architecture.
Next, you need to run the bundle from the command line. The bundle is a wrapper script. As a security precaution, it is shipped without the executable bit, so you will need to turn it on before you can invoke the script.
chmod +x <VMware Workstation>.bundle
Then, run the bundle. You need to install as root. Later, you can run either as root or a standard user. Please note that the settings for each user will be separate.
./<VMware Workstation>.bundle
You will be asked to accept the License Agreement:

Optionally, you can configure VMware Workstation to use Integrated Virtual Debugger. If none is found, you will have the option to install Eclipse and configure it. Most users will not need bother.

The Workstation will now begin to install:


This is only step one. Now, you need to go back to the command line and execute:
vmware
This will begin the compilation of relevant modules. For this, you will need gcc, make, kernel sources, and kernel headers for the running kernel. I've explained this step on numerous occasions, including the setup of VMware Tools in Linux Mint, the setup of VMware Server on Ubuntu, my Fedora 10 Cambridge review, and others.

Again, an EULA:

And you're done:

Using VMware Workstation
If you've used VMware Player or Server before, things will look very familiar. Basically, it's the same old product, on healthy steroids, with quite a few extras. I will show you a few, just to whet your appetite.
Fedora 12 as guest
I started my explorations by installing Fedora 12, to a NTFS-formatted external disk, both to conserve space on the local disk and improve performance. First, I made sure my kernel was up to date, installed gcc, make and the accompanying build utilities, then installed VMware Tools so I could fully enjoy the advanced features. Worked like a charm. I even had Bluetooth sharing enabled inside the guest.

Even Web camera worked without any problems:

And here's Unity in action below. For those wondering what this would be, well, it's similar to Seamless Mode in VirtualBox.
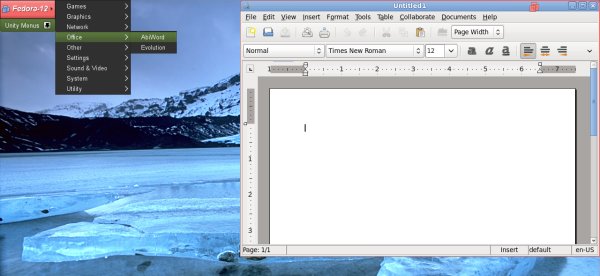
For your active and running virtual machines, the console will be replaced with the Unity message, so you can easily locate all your applications.

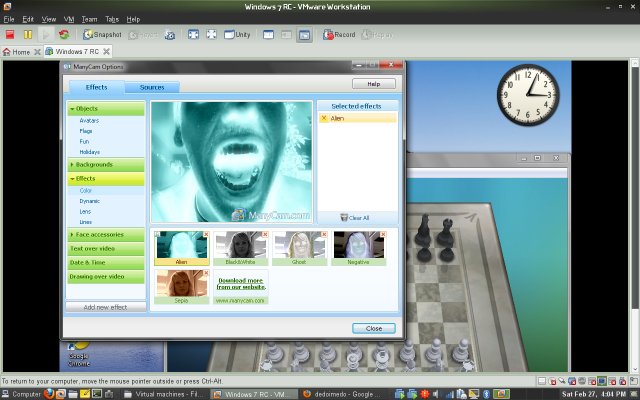
Windows 7 example
Here's Windows 7, running from an external USB disk, formatted with NTFS. The guest machine has the VMware Tools installed and 3D acceleration enabled, so we have Aero and Unity. I yanked Internet Explorer 8 out of the virtual machine and placed it onto my beautiful SUSE desktop.


As to USB support, how about some Web camera sharing?

And windowed, so you truly believe me:
Conclusion
VMware Workstation is supreme. There's no other way to describe it. Everything worked great, without a single error. The installation setup was flawless. The usage was flawless. I dabbled with all sorts of features, including the less trivial use of an external USB device formatted with NTFS as storage, shared the machine peripherals and had graphical effects enabled in guest machines.
Comparing VMware Workstation to my freebie favorite, VMware Server, Workstation is definitely and undoubtedly the Rolls Royce of virtualization. It takes the great stuff a step further, enabling a whole new range of possibilities - and fun. Even a single day into the evaluation, I'm convinced.
Here's some free advertising from Dedoimedo: buy it. You won't regret it.
Cheers!