Updated: May 7, 2011
All right, so you know all about Kerkythea and you've started dabbling in POV-Ray. If you recall the introduction article to ray tracing, you will remember the fact the latter program is pretty much command-line only. In order to use it to any reasonable degree of beauty, you will need to become a master of POV-Ray code. Or will you?
Well, there's an easier way after all. POV-Ray comes with a Google SketchUp plugin, much like Kerkythea has one. This allows you to grab your models created using the sleight of hand and lots of imagination, and convert them into POV-Ray code. Then, you can load them into your POV-Ray and render them. Sounds great, and this is exactly what we will learn today. Last time, I used Macbuntu for demonstration; I'll use Windows now. This will also give you an opportunity to see how well POV-Ray behaves on another operating system.

Get POV-Ray & SU2POV plugin
First, install POV-Ray on your Windows box. There's a dedicated 64-bit installation, too. The program wants to install into your user profile directory, so it needs no administrator privileges. Next, get the plugin. It's a ruby script, just like Kerkythea SketchUp Importer. Place it into the plugins sub-directory of your SketchUp installation and Bob's your nephew.
Using SU2POV
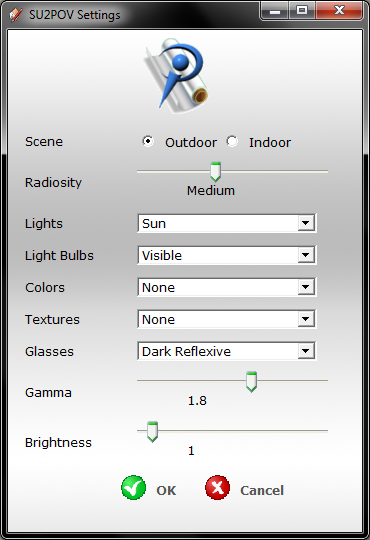
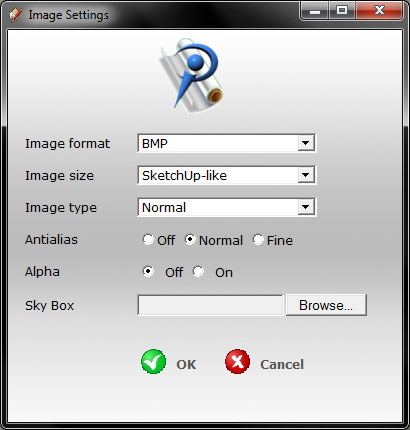
Now, let's see how this thing works. In Google SketchUp, under Plugins, you will see another entry added called Install POV-Ray render. In the sub-menu, you have several options, including adding lights and changing image and rendering options.

The type of scene, radiosity, the use of colors and lights and glasses will determine both the look and the quality of the final render. If you go for medium radiosity, your images will take a few moments to render and look just ok. If you go for higher settings, the rendering time can increase to several tens of minutes with much better final output. If you go for ultra quality, then you can expect days of CPU revving.
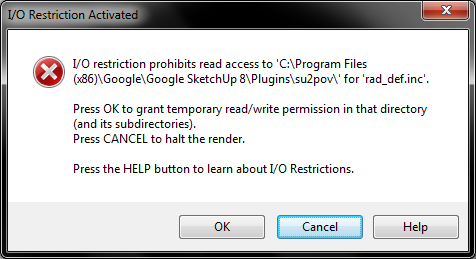
While converting the model, depending on your system permissions, as well POV-Ray and SketchUp, you may get a read/write error. You will need to sort these kinds of things out before you can fully enjoy the powers of POV-Ray.
POV-Ray code
After the models are exported, just open them in POV-Ray. Unlike Linux, the Windows version comes with a basic text-editor like GUI, designed for less command-line prone users. You will get something like this:

Before we dig deep into art, let's take a few moments to examine the GUI and see some of the basic options and examples.
Overview & examples
Pretty straightforward, lots of buttons which do exactly what they say. If you've used other 3D art software before, the interface will not look like an alien battleship command console. You get tabs for your code, the ability to insert all kinds of fixtures, change rendering options and more.

There are quite a few examples packaged with the program. You can load and test them before you try more serious code, like your own examples - or mine.


Google SketchUp models
Now, what you've been waiting for; my superb models, which have already been infused with the wonders of Kerkythea magic. Starting with this article, I will work on improving the POV-Ray renders, until I get perfect, near-real-life art for you.


This is just a beginning. For instance, comparing the spaceship render to results achieved in Kerkythea after exporting the model, the initial results are a still bit cartoonish. Worry not, though. Remember my first attempts with Kerkythea? Well, I'm hoping to achieve similar results with POV-Ray. Stay sharp and tuned.
Conclusion
POV-Ray is a great program. Twined with SU2POV plugin, it becomes even greater. You enjoy the best of both worlds - the artistic, abstract simplicity of Google SketchUp and the high-quality rendering powers of POV-Ray, without being an expert in code. What more could you ask for?
Although the plugin is only available for Windows and Mac, you should not lament, as you can simply copy the exported .pov code to your Linux box and render it there natively, or maybe try running Google SketchUp via Wine, including the plugin. Whatever the architectural composition, you now have yet another marvelous tool that will make your art shine. For me, this is the best thing since sliced bread and six-speed manual gearbox.
More good things coming, as I've promised before; Blender, anim8or, various other plugins, exporting and importing tricks, animation and effects software, and more. Stick around and you shall see art burst forth from Dedoimedo.
Cheers.