Basic configurations
Mandriva is well oriented toward the new Linux user in utilizing the very graphical Mandriva Linux Control Center for administration and configuration of the system. The centralized approach can greatly reduce the level of stress for newbies.
To configure your computer, you can either click the shortcut on the right side of the Firefox icon on the top panel or via System > Administration > Configure your computer.
Mandriva Linux Control Center will come up. It is somewhat similar to SUSE YaST. Different administration categories are divided to facilitate the navigation. The default choice will be the Software Management panel.
Under Software Management, you can update your system, install/uninstall packages and select download sources (repositories) for the system update.

System update
For example, let's update our system (Look at available updates and apply any fixes ...). The wizard will ask you nice and polite questions and confirm every step you make.


Under Hardware management, you can setup different peripheral devices, including UPS, configure a fancy 3D desktop manager called Drake3D (similar to Beryl, Compiz and others), but most importantly configure your audio and video drivers.

Indeed, one of the first questions a former Windows user will ask is: Will my drivers work? There has been a tremendous effort in the community lately to make the distributions as friendly and commandlineless as possible, to allow smooth and painless transition for newbies.
Both SUSE and (K)ubuntu now offer the required drivers via their package managers and Mandriva is no exception. Of course, if you want, you can still do it the traditional way - download the drivers, stop the X Server, install the driver, restart the X Server. You can read much more about this in my article called Highly useful Linux commands & configurations.
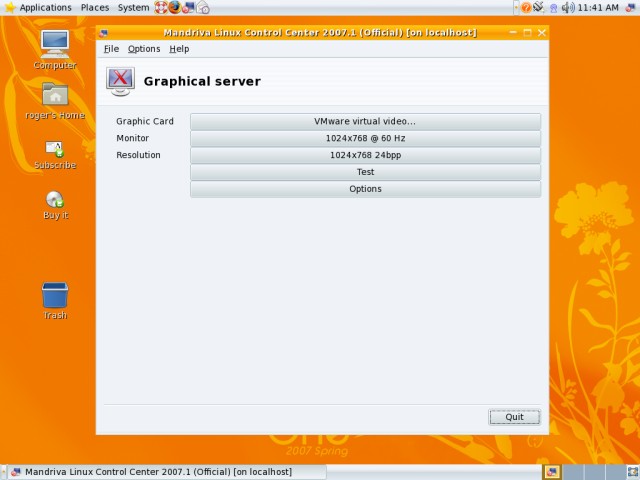
Setting up graphic card
Let's setup the graphical server. The wizard will present you with the existing configuration, namely the current graphic card that it sees, the monitor resolution and refresh rate, the color depth, and the ability to test your configuration before committing changes.
To change the selection, click on Graphic Card.
Here are the currently available supported ATI devices.

And here goes Nvidia.

Finally, once you make your selection from the long, comfortable list of supported devices, you can decide on some extra options. Very importantly, you will be able to test the device before you OK the change. You'll be back to screen 1, the one we have started with.

And if you want, the 3D desktop (VMware does not support OpenGL, hence no effects for me):

This demonstrates the simplicity of the centralized and quite graphical management of resources. It takes a bit longer than apt-get in (K)ubuntu, but is simpler in that it does not require any use of command line, the single biggest source of terror for most Windows users. On the other hand, it's cleaner and easier to use than YaST in SUSE.
As the titles on tabs clearly indicate, Network & Internet panel allows you to setup your network interfaces, System allows you to change environmental settings (time, date, language, fonts etc.), manage system services, manage users, run a terminal, or perform a backup, while Mount points allow you to manage hard disks, partitions, optical drivers, and network shares, if they exist.


Security is probably what you have wondered about from the beginning. Linux being secure as is, you still might want to configure a firewall.